How to set up Abstraxn Smart Wallets using the Abstraxn Dashboard.
Get Your API Key
To use Abstraxn Smart Wallets, you need to obtain an API key from the Abstraxn Dashboard.- Visit https://dashboard.abstraxn.com/ and log in or sign up
-
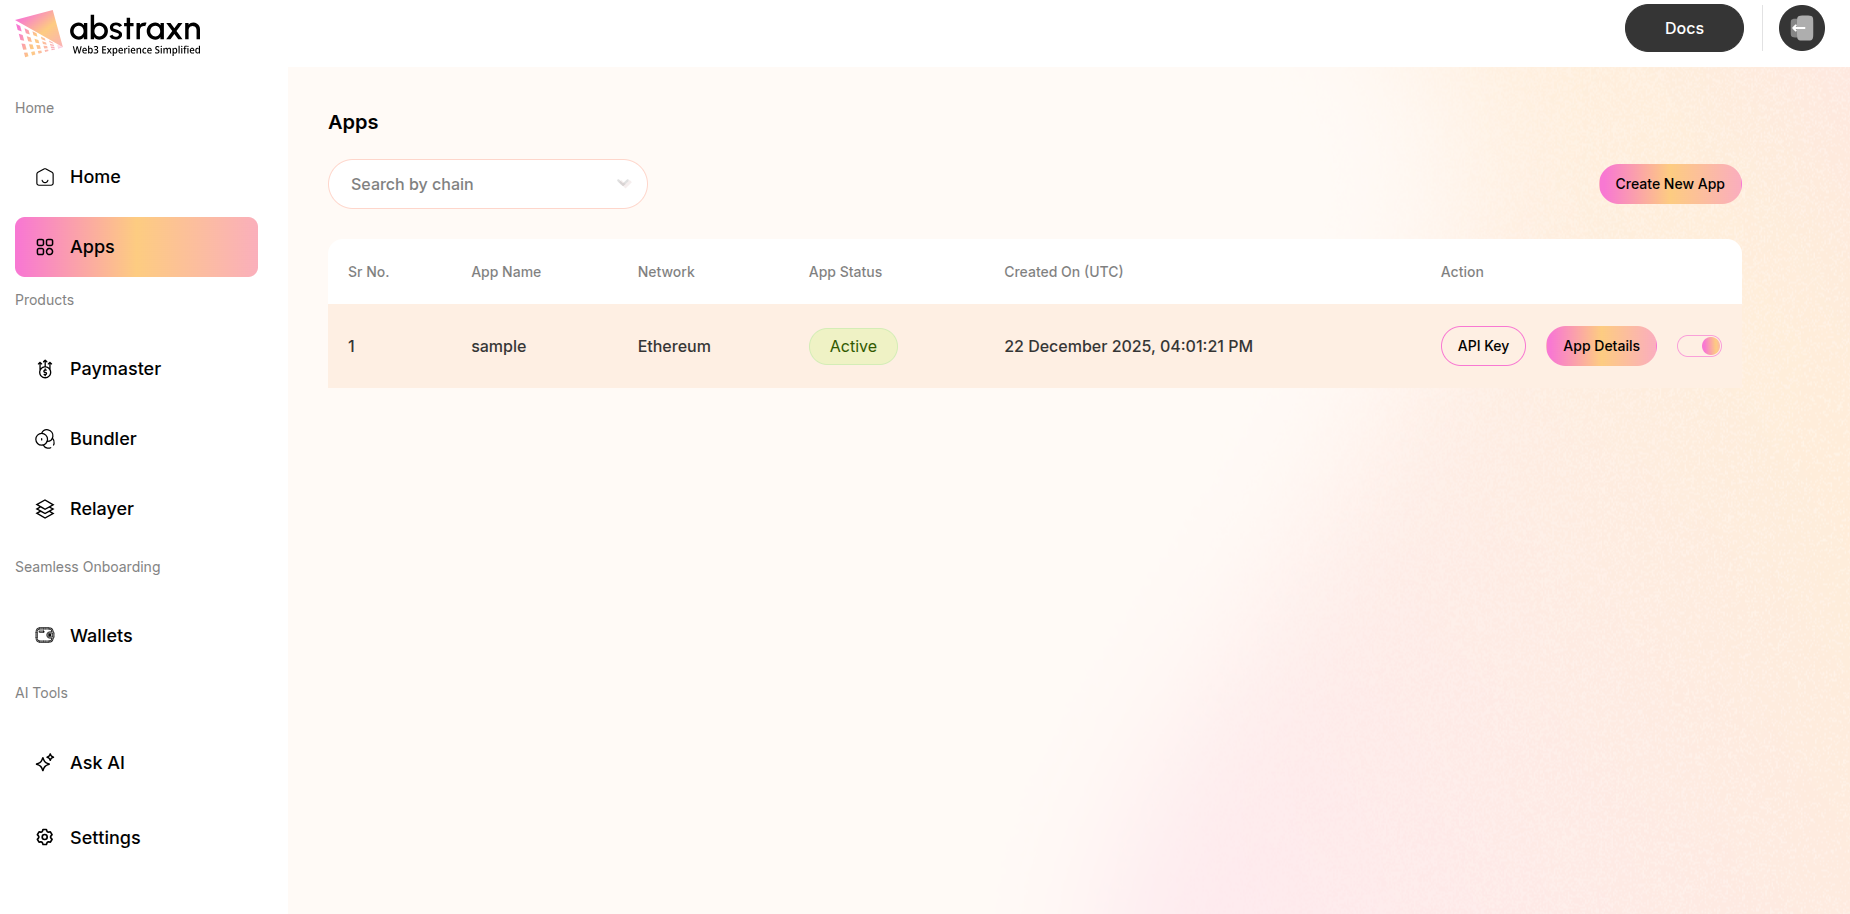
Navigate to the Apps section:
- Direct link: https://dashboard.abstraxn.com/auth/apps
First-time users: If you’re visiting for the first time and haven’t created any apps yet, you’ll see an empty table with a Create New App button at the top. This is normal - proceed to step 3 to create your first app.
-
Click the Create New App button to open the creation modal
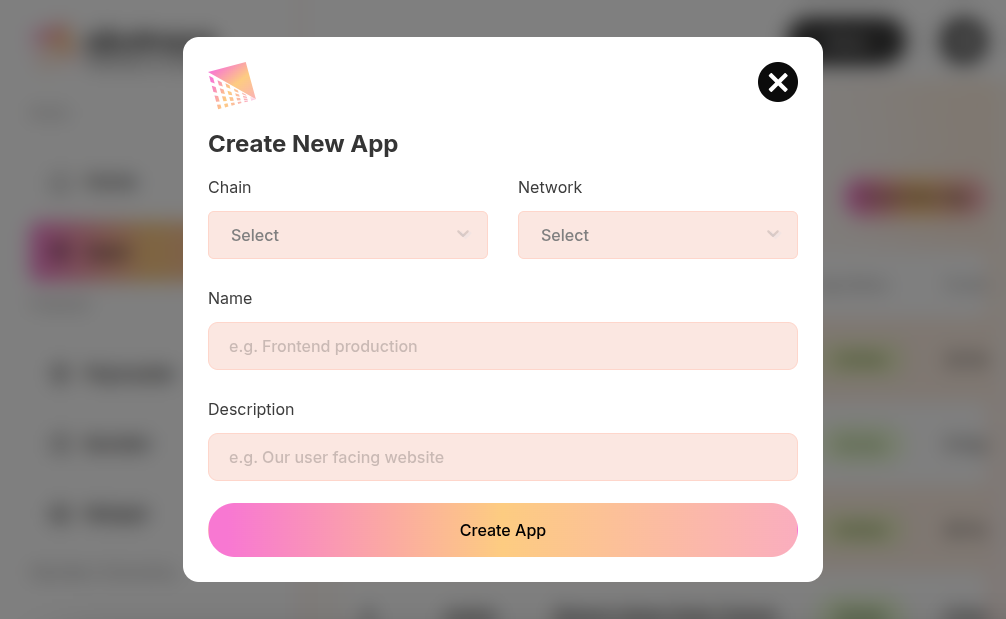 Fill in the form:
- Chain: Select the blockchain (e.g., Ethereum, Polygon, etc.)
- Network: Select the network (Mainnet, Testnet, etc.)
- Name: Enter a name for your app
- Description: (Optional) Add a description
- Click Create App
-
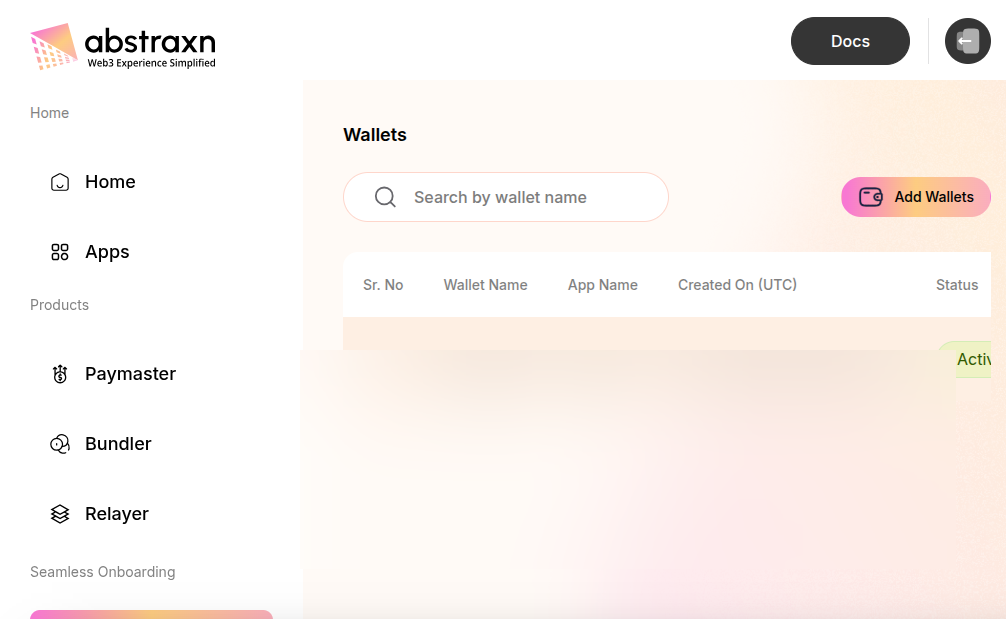
After creating your app, navigate to Wallets section:
- Direct link: https://dashboard.abstraxn.com/auth/wallets
-
Click Add Wallets button to create a new wallet service
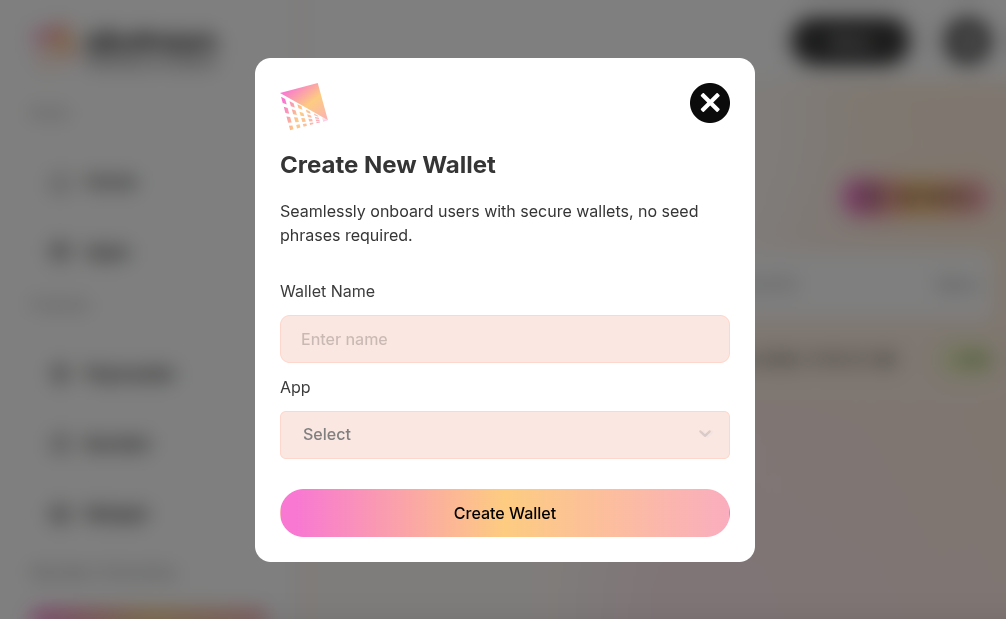 Fill in the form:
- Wallet Name: Enter a name for your wallet service
- App: Select the app you created earlier
- Click Create Wallet
- After creating the wallet, click View Details on your wallet from the wallets list
-
On the wallet details page, you’ll see your API Key displayed. Click the copy button to copy it.
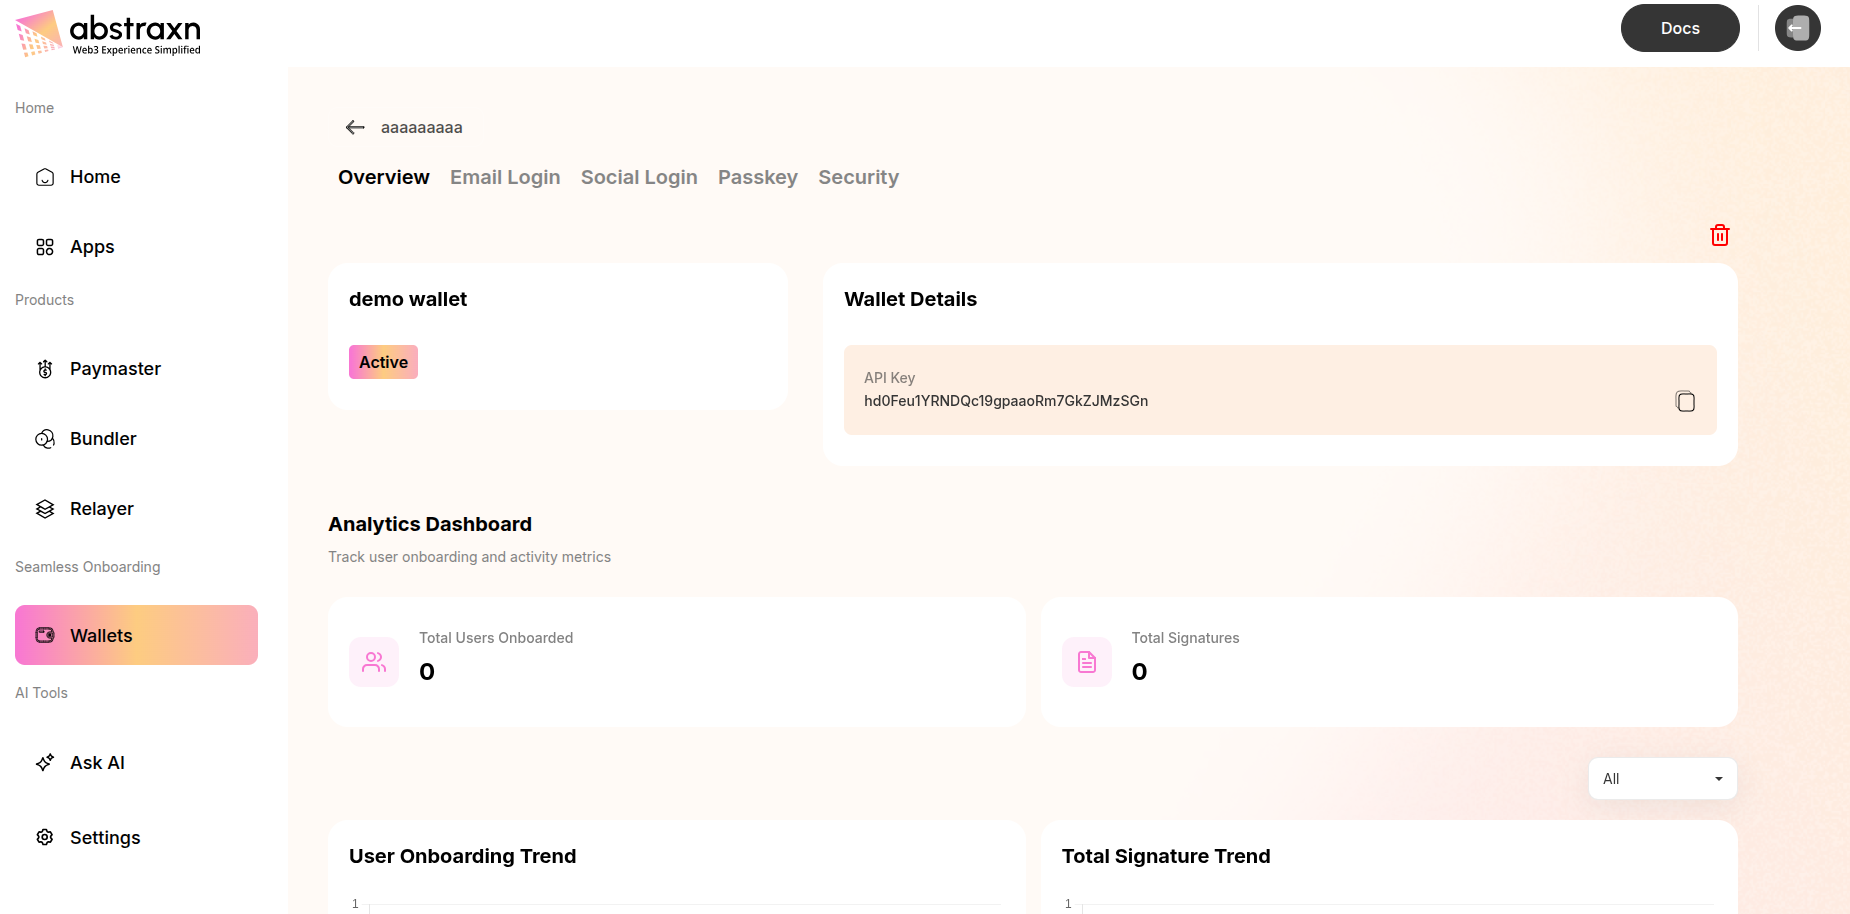 The wallet details page URL format is:
 https://dashboard.abstraxn.com/auth/wallets/{walletId}
Configure Environment Variables
Create a.env file at the root of your project and add your API key.
For Vite Projects
Create a.env file in your project root:
VITE_ prefix is required for Vite to expose the variable to your client-side code. Access it in your code using:
For Next.js Projects
Create a.env.local file in your project root:
NEXT_PUBLIC_ prefix is required for Next.js to expose the variable to the browser. Access it in your code using:
Additional Configuration (Optional)
Wallet Service Configuration
To enable specific login methods and customize your wallet service:- Navigate to Wallets → Configuration in the dashboard
- Configure your preferred authentication methods (OTP, Passkey, Google, Discord, Twitter, etc.)
- Customize wallet settings as needed